Tein pienen nopean tutorialin, josta näkee miten
vesimarmorointi (meinasin kirjoittaa marmelointi :D) toteutetaan. Vesimarmorointi tekniikalla saa todellakin paljon hienompia luomuksia, kuin tämä minkä tein, mutta ideana oli vain jakaa teidän kanssa, että miten se oikesti toimii :) Aijon harjoitella tätä enemmän ja teen sitten uuden videon. Kiva kun katsoitte ja kokeilkaa vaan rohkeasti, se ei oikeasti ole vaikeaa. Kannattaa kokeilla eri lakkoja, koska kaikki lakat eivät sovi tähän tarkoitukseen. Esim. suurin osa China Glazen lakoista ovat todella hyviä tässä ja halvempana vaihtoehtona on Golden Rose, minusta neki sopivat tähän hyvin. Merkillä ei loppujen lopuksi ole väliä, mutta näistä kahdesta merkistä suurin osa sopii tähän. Vesi ei saa olla kylmää, eikä kuumaa, vaan suunnilleen huoneenlämpöistä. Kynsinauhat kannattaa suojata teipillä, mutta kyllä ne saa siistittyä topsipuikolla ja kynsilakanpoistoaineella helposti.
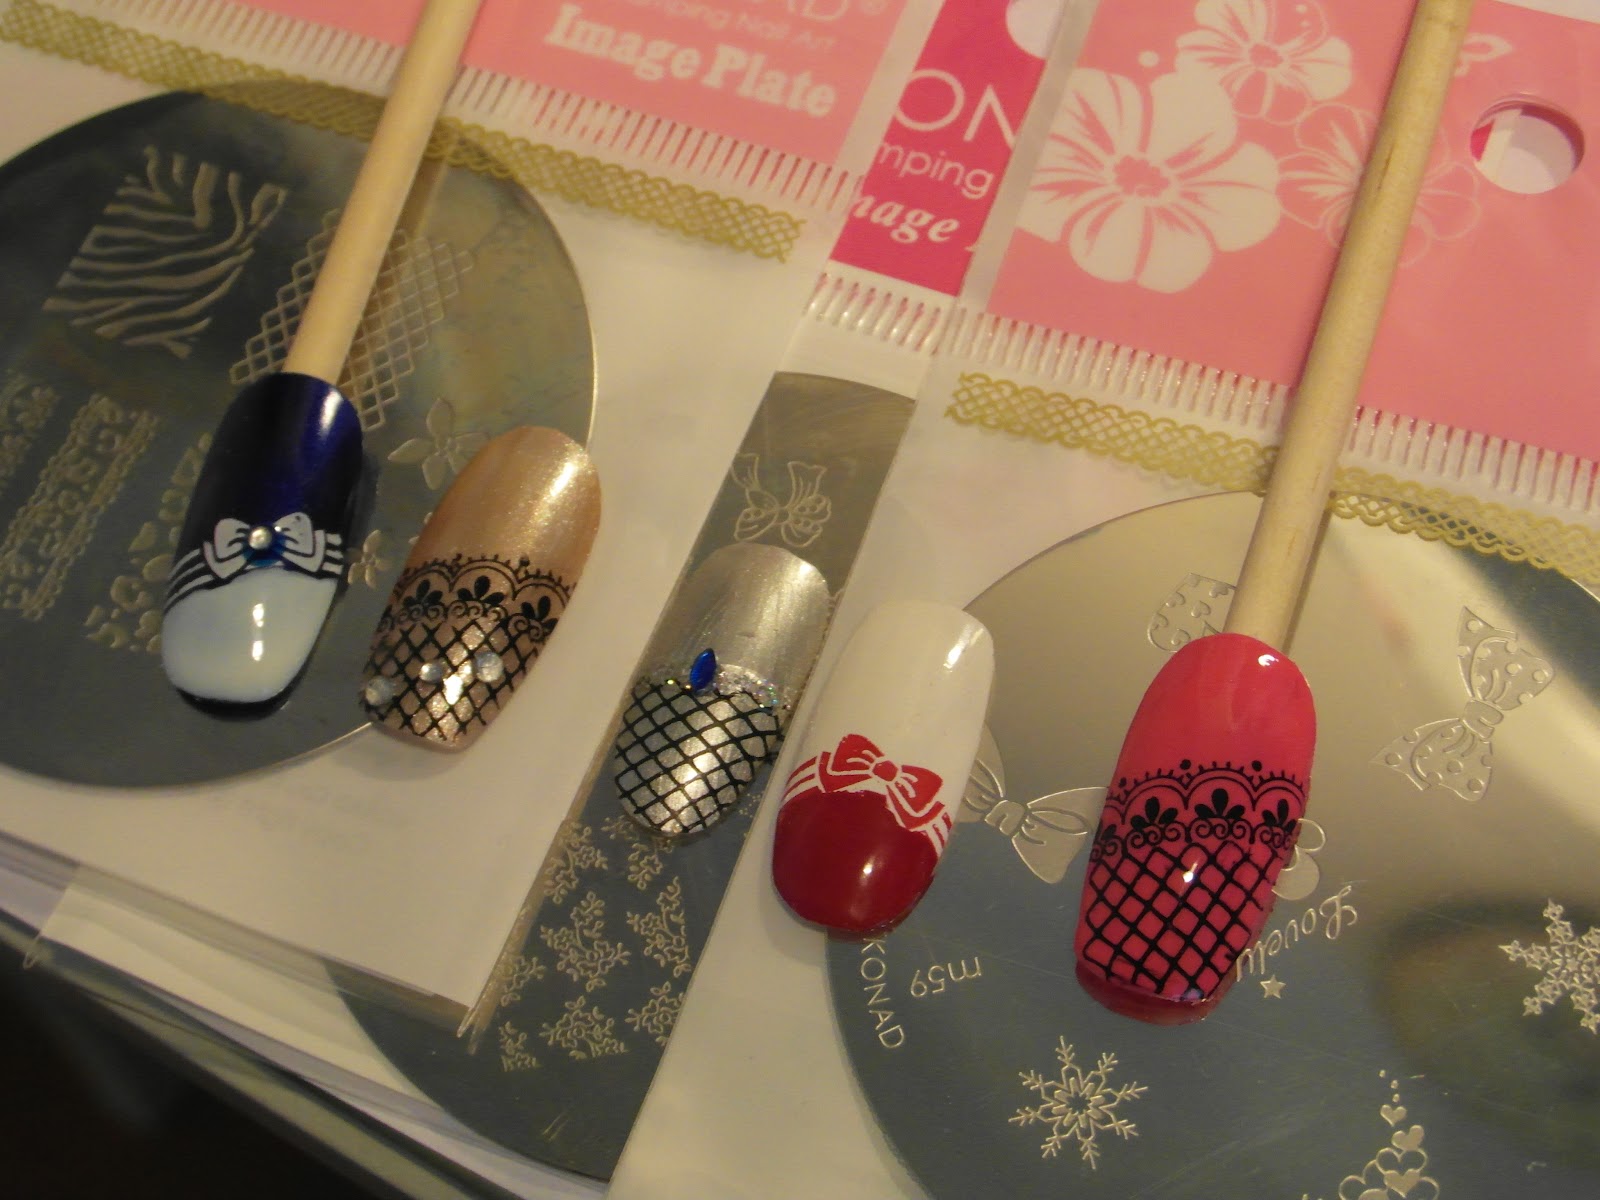
This is a very quick video of a very simple
water marble design. It's just a simple one, 'cause the idea was just to show you guys how water marbling actually works. I'm gonna practice marbling lot more and I'll make then a new video. Thank you for watching the and hope you'll try it, 'cause it really isn't hard. You just have to have patience and try different polishes, 'cause not all works. Example most of the China Glaze polishes work really good and if you wanna go with more affordable, also Golden Rose works just fine. But it the end it doesn't depend about the brand, because all colors has different kind of texture and less or more pigments. Im just saying this two brand has lots of nail varnishes which works. And also you must remember the water should not be cold or hot, it should be about room temperature. It's recommended to cover your cuticles with tape, but it's not too hard to clean the excess polish with some nail polish remover and a cotton swab.
Tässä ensimmäinen marmorointi, jonka jaksoin tehdä kaikkiin kynsiin =)
Here's the first marbling I made on all of my nails =)
PS. VIIKON VINKKI: Tiedäntiedän, tätä on todella vaikea muistaa ja seurata, mutta jos teet niin, niin saat vahvemmat ja halutessasi pidemmät kynnet. Hiero käsiisi, etenkin kynsinauhoihin, oliiviöljyä 3-4 kertaa viikossa (hiero 5-10min) ja kynsinauhoihin niille tarkoitettua öljyä joka päivä monta kertaa päivässä. PLUS käytä aluslakkan AINA kynsiävahvistavaa kynsilakkaa. Suosittelen todellakin SALLY HANSENIN MAXIMUM GROWTH kynsiävahvistavaa lakkaa, se toimi minulla! Sitä kuuluu lisätä yhden kerroksen joka päivä viiden päivän ajan ja sitten ottaa kynsilakanpoistoaineella pois ja aloittaa alusta. Se toimii ja se antaa todella upean kiillon. Myös SALLY HANSENIN MIRACLE NAIL THICKENER on hyvä! Käytän sitä aina kun olen ottanu juuri geelikynnet pois, koska kun ottaa geelit tai akryylit pois, niin omat kynnet ovat usein ohuemmat (ei kaikilla tietenkään, mutta mulla on itelläni heikommat kynnet). MUTTA kaikki alkaa oliiviöljystä, kynsinauhaöljystä ja tietenkin käsien perusrasvaamisesta.
Kauniit kynnet eivät ole kaikkien helppo saavuttaa, mutta näiden ohjeiden seuraaminen on askel kohti terveitä kynsi ;)
PS. TIP OF THE WEEK: I know it's super hard to remember, but if you do, your nails will grow stronger and longer! Rub olive oil all over your hands, specially in to your cuticles about 3-4 times in week (do it for 5-10min) and remember to rub cuticle oil several times everyday! PLUS use nail strenghtener as a base everytime you put nailpolish.I seriously recommend SALLY HANSEN MAXIMUM GROWTH. It's a strenghtener which have worked for me. You add a coat everyday for five days and then remove it and start all over again. It works and it has a beautiful shine. Also SALLY HANSEN MIRACLE NAIL THICKENER is supergood! I use it always after I have removed gel (artificial nails), cause after removing gel or acrylic nails are often thinner. BUT it all starts from olive oil and cuticle oil and of course creaming your hands.
Beautiful nails are not easy to achieve to everybody, but all this is taking a step towards healthy nails ;)